Showing posts with label Birthday. Show all posts

Monday, August 24, 2020

Thursday, May 26, 2016

Cricut "Have the Yappiest Birthday"

It's been a while since I posted. I have been so busy with my kids--- school stuff, soccer, and other daily commitments. However, today, I took time out to make a birthday card for my nephew. I hope you like it. It was fun rifling through my stash. It's like Christmas in May  ;)
I used some "stuff" that I already had in my stash:

  • Cricut "Create a Critter"
  • My Pink Stamper "Biggie Punnies."
  • Stampin Up Gumball Green embossing folder
  • Miscellaneous cardstock


Wednesday, January 27, 2016

Happy 40th Birthday

Here is a simple card I made using the new stamp set  "Number of Years" and the matching framelits. This was so easy to make that it can be mass produced.


Below is the list of supply I used to make this card. Please visit my online store to shop at your convenience. Click HERE to access my Stampin Up store. Don't forget, it's Sale-A-Bration time. For every $50 you spend, you can earn a free item from the SAB catalog. You can access the catalogs from this blog.
Built for Free Using: My Stampin Blog

Below is tutorial on how to make this card:


Thank you for watching and Happy Crafting!!!

Sunday, August 2, 2015

Watercolor Wings Birthday Card

I saw this card on Instagram and decided to CAS (Copy And Share) it using my Stampin Up stash. This card (I believe) was on the MFT Stamps Instagram site. 


I ended up adding the body of the butterfly after I finished filming the video. I thought it needed something "more." I have never heat embossed on window card sheets before and was surprised it held up. But; then again, it is a small image and it didn't take that long to melt the embossing powder. If you noticed, I also embossed the antenna. I used a VersaMark pen to "draw" on the stamped image of it. (I can't leave well enough alone. LOL)


Below is a video demonstrating this how to create this card. Please don't forget to subscribe to my YouTube channel and share with your crafty friends. Thank you for watching. 


If you are interested in any of the products below, please click HERE to shop my store. Thank you :)

Saturday, August 1, 2015

Wednesday, July 29, 2015

Birthday Gift Card Holder ("A" cardswap tutorial.)

Thank you for heading here to my blog. I really appreciate it :)

Here are instructions on how to make this gift card holder that I created for the card swap:

Panel:
  • Take a piece of whisper white cardstock measured at 5 1/8 X 3 1/2. Using a corner rounder, round off the top two corners. 
  • Using a 1 1/4 circle punch, punch out circles from coordinating designer series paper or solid card stock. Fold in half. Adhere to the top of the card panel.
  • Using a vertical slot punch (you may also use an 1/8 circle punch,) pierce an opening in the middle of the tab.
  • Thread ribbons through and tie off with bakers twine.
  • To adhere the gift card, use a piece of glue dot. 
Sentiment:
  • Die cut or punch out oval pieces.
  • Stamp your sentiment.
  • Sponge around the edges to get a finished look.
  • Adhere on to the mini treat bag.


Mini-treat bag holder:
Below is a tutorial on how to assemble the mini treat bag holder.
 

Below are the products I used (and, some are suggestions.) If you are interested in any of these items, please visit my on-line store. Please click HERE.

Thursday, May 28, 2015

Celebrate Shaker Card

I made another shaker card, but, this time it's for a challenge from my stampers group.
I used all Stampin Up products, except for the sequins. I made my own designer paper using the banner element from the same stamp set. I ended up running out of "Real Red" card stock so I had to create my own by using my "Real Red" Stampin Up markers to color the edges of the "Whisper White" card-stock. Click HERE to shop my store.  


Tuesday, May 19, 2015

"I'd never forget you." Minion card

I made this card for my daughter's reading buddy. Although it was quite detailed, I enjoyed making him. He is adorable!!!


To make this card, I needed the following (all products are from Stampin Up, otherwise noted):

  • "3/4 circle punch #119873
  • "1 circle punch #119868
  • "3/8 circle punch (retired)
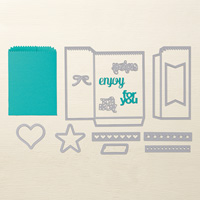
  • Word Window punch #119857
  • Ovals Collection Framelits (#129381)
  • Modern Label punch (retired)
  • Medium Tag punch (retired)
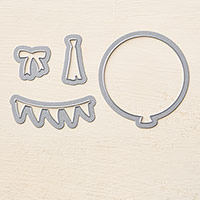
  • Simon Says Stamp balloon die
  • Hero Arts "OWH Little Hoot" Stamp Set
  • Daffodil Delight cardstock & ink
  • Night of Navy cardstock  & ink
  • Uni-ball Signo Gel Pen (#105021)
Step-by-step instructions. Hope it makes sense. If not, please contact me.
  1. Take the 3rd to the smallest oval framlit, die cut. Trim off "1/4 of an inch from each side.
  2. Sponge around the edges using ink.
  3. For his arms, use the Word Window Punch and punch out a piece of Daffodil delight card stock, sponge using Daffodil Delight ink and cut in half. Adhere to his body.
  4. For his legs, use the Word Window Punch and punch out a piece of Night of Navy card stock, sponge using Night of Navy ink and cut in half. Adhere to his body. For his shoes, use the '3/4 circle punch, and punch out a piece of black card stock. Cut the circle in half. Adhere to the tip of his legs
  5. For his overalls, take the 3rd to the smallest oval framlit, die cut. Trim off "1/4 of an inch from each side. Cut the trimmed oval in half. Use the tip of the tag punch to trim out the overalls. For the overall straps, use the Word Window Punch and punch out a piece of Night of Navy card stock, sponge using Night of Navy ink and cut in half. Adhere to the overalls. USe a white gel pen to create faux stitches.
  6. For his glasses, use the "3/4 punch to punch out a piece of Basic Gray card stock. Use the "1 circle punch to punch around the "3/4 hole-- which, will give you the eye glasses. For the eye glass strap, use the Modern Label punch and trim the edges to have enough to stick onto the Minion and the eyeglass frames. For his eyes, use the "3/4 circle punch and punch Whisper White paper, two times. Repeat and use Basic Black and the "3/8 circle punch for the pupils. 
  7. For the balloon, I used the 2nd smallest balloon die from the Simon Says Stamp Die collection and Hero Arts (OWH Little Hoot) for the sentiment.
*** You can swap out the sentiment for a birthday sentiment and make it a birthday card.