Showing posts with label Hardwood Background. Show all posts

Monday, January 11, 2016

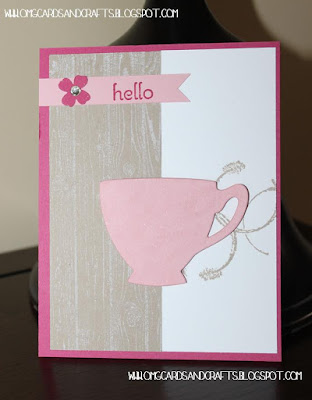
"A Nice Cuppa Hello"


Here is a quick card I made using the Mojo Monday sketch. I have not crafted for "fun" since November. I have been making cards, note cards, and other 3D crafts for presents. Plus, we have been so busy with soccer. I thought soccer would be over by now; but, both of my older kids made the All-Star team. I am very proud of them; but, I can so use a break.


Below is a video demonstrating how I made this card. It is so super quick and easy that I am going to make multiples and stash it. But, I am going to leave the sentiment blank to customize it for specific family and friends.  Here is the list of products that I used to make this card. Please visit my Stampin Up store and click HERE to shop.


Built for Free Using: My Stampin Blog


Thank you and happy crafting!!!

Tuesday, August 11, 2015

Just Sayin' Hello


Here is a quick and simple card using a masking technique. I masked off a portion to make space for my sentiment. I ended up using the "Hardwood' background stamp to give a little bit more texture to the card.  Below is a tutorial on how to make the card:


Below are the products I used from Stampin Up. If you would like any of these products, please shop my online store. Click HERE to access it. If  you purchase $25.00 or more from my online store, I will send you a Stampin Up annual catalog and a mini-holiday catalog.

Built for Free Using: My Stampin Blog

Wednesday, January 28, 2015

"Love" Clean & Simple Embossing

I am so motivated!!! I am taking this online card class and it is really breaking me out of my creative rut. Here is the card that I cased from the class. Hope you like it.
Here is what you will need to make this card panel:

  • Cut the masking paper at 3 3/4 square (or the shape of your panel. My panel is 3 3/4 x 5 1/2.) Use any basic shape die cut you want for your focal point. Die cut.
  • Using Versamark ink, cover your entire background stamp with it.
  • Place your die-cut masking paper on the white cardstock. Don't worry, it will not hurt the ink at all.
  • Next, cover your shape (in this case, the heart) with red embossing powder. Heat set. Try and avoid the uncovered parts of your cardstock to prevent the Versamark ink from drying out. Slowly peel off the masking paper.
  • Then, cover the rest of your card with the second color of embossing powder. Using a soft brush, brush off any excess that may stick onto your shape. Heat set.
  • Die cut a sentiment to go across your shape. Adhere.
  • I colored the clear rhinestones with Cherry Cobbler Stampin Blendabilities.


Most of the products are from Stampin Up. Please click HERE to visit my store.
  • Hardwood Background Stamp #133032
  • Embossing Powders - Cherry Cobbler #122949 & Silver #109131
  • Framelits - Hearts #125599 & Expressions (Retired)
  • Whisper White paper #100730
  • Basic Black #121045
  • Rhinestones #119246
  • Stampin' Blendabilities - Cherry Cobbler #130995